電脳>MovableType4.0とGoogle Adsense
MovableType4.0では、広告を入れるのも簡単になりました。前回のGoogle Analyticsのコード埋め込みで紹介したように、テンプレートモジュールの中にAdsenseで取得したスクリプトを埋め込むだけで、OKです。
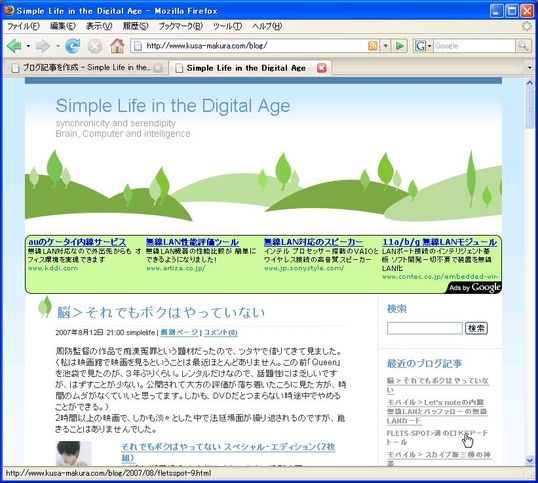
実際に本サイトを見ていただけばわかるとおり、4箇所に広告を入れている。
A.タイトルの下に コンテンツ向けAdsenseの728×90のビッグバナー
B.ブログ記事の本文と続きの間に紹介の336×280のスクウェア
C.右のサイドバーの下の方にコンテンツ向けAdsenseの120×600のスカイスクレイパー
D.一番下にタイトルと同じコンテンツ向けAdsenseの728×90のビッグバナー
この広告の設定について、ご紹介する。
それでは、手順を説明していきます。
①[Google Adsense](https://www.google.com/adsense/)でアカウントを取得しログインする。
②広告ユニットを取得する。
コンテンツ向けAdsenseで、728×90のビッグバナーを作成する。角を丸くして枠線表示すると見た目は良い。
コンテンツ向けAdsenseで、120×600のスカイスクレイパーを作成する。
紹介で336×280のスクウェアを作成する。
③MovableType4.0にログインする。
④メニューから「デザイン」ー「テンプレート」を選択する。
⑤テンプレート表示画面で、右側のクイックフィルタからテンプレートモジュールをクリックする。
⑥テンプレートモジュールから「ヘッダー」を選択する。
「ヘッダー」の中にビッグバナーを以下のように埋め込む。
</MTIf>
</div>
</div>
</div>
<script type="text/javascript"><!--
google_ad_client = "pub-xxxxxxxxxxxxxxxx";
google_ad_width = 728;
google_ad_height = 90;
google_ad_format = "728x90_as";
google_ad_type = "text_image";
//2007-08-17: Hands on PC
google_ad_channel = "0547580443";
google_color_border = "000000";
google_color_bg = "CAF99B";
google_color_link = "0000FF";
google_color_text = "000000";
google_color_url = "0D8F63";
google_ui_features = "rc:10";
//-->
</script>
<script type="text/javascript"
src="http://pagead2.googlesyndication.com/pagead/show_ads.js">
</script>

<div id="content">
<div id="content-inner">
<div id="alpha">
<div id="alpha-inner">
⑦「ブログ記事の詳細」にスクエアを以下のように埋め込む。
<MTIfNonEmpty tag="EntryMore" convert_breaks="0">
<div id="more" class="asset-more">
<script type="text/javascript"><!--
google_ad_client = "pub-xxxxxxxxxxxxxxxx";
google_ad_width = 336;
google_ad_height = 280;
google_ad_format = "336x280_as";
google_ad_type = "text_image";
//2007-08-31: Books, Go, Hands on PC
google_ad_channel = "2380601707+8476705949+0547580443";
google_color_border = "0066CC";
google_color_bg = "FFFFFF";
google_color_link = "0000FF";
google_color_text = "000000";
google_color_url = "008000";
google_ui_features = "rc:6";
//-->
</script>
<script type="text/javascript"
src="http://pagead2.googlesyndication.com/pagead/show_ads.js">
</script>
<$MTEntryMore$>
</div>
</MTIfNonEmpty>
⑧「サイドバー(2カラム)」にスカイスクレイパーを以下のように組み込む。
<div class="widget-powered widget">
<div class="widget-content">
<a href="http://www.movabletype.com/"><img src="<$MTStaticWebPath$>images/mt4-bug-pbmt-white.png" alt="Powered by Movable Type <$MTVersion$>" width="120" height="75" /></a>
</div>
<script type="text/javascript"><!--
google_ad_client = "pub-xxxxxxxxxxxxxxxx";
google_ad_width = 120;
google_ad_height = 600;
google_ad_format = "120x600_as";
google_cpa_choice = "CAEaCK1qAfDfFshdUA1QqwJQBVAI";
//-->
</script>
<script type="text/javascript" src="http://pagead2.googlesyndication.com/pagead/show_ads.js">
</script>
</div>
</div>
⑨「フッター」にビッグバナーを以下のとおり組み込む。
</div>
</div>

<script type="text/javascript"><!--
google_ad_client = "pub-xxxxxxxxxxxxxxxx";
google_ad_width = 728;
google_ad_height = 90;
google_ad_format = "728x90_as";
google_ad_type = "text_image";
//2007-08-17: Hands on PC
google_ad_channel = "0547580443";
google_color_border = "000000";
google_color_bg = "CAF99B";
google_color_link = "0000FF";
google_color_text = "000000";
google_color_url = "0D8F63";
google_ui_features = "rc:10";
//-->
</script>
<script type="text/javascript"
src="http://pagead2.googlesyndication.com/pagead/show_ads.js">
</script>

<div id="footer">
<div id="footer-inner">
<div id="footer-content">
⑩設定変更を保存して完了。必ず「再構築」が必要です。






コメントを残す